

Today i’m starting to post a series i’ve been thinking about posting for years. I stopped blogging during COVID and then my son was born and it’s taken me a while to get back into it. But now that I have, I want to complete this quest. This series is all about security. In my experience, a lot of people don’t fully understand how the security model in Dataverse and Dynamics really works—there are plenty of hidden nuances that get overlooked. Sure, there’s tons of documentation and all the info is out there but my goal is to comprehensively get everything into one place. I figure a fun way to do that is for me to go through all the pain and anguish of figuring this stuff out and share the experience with you!
I’ll be breaking it down piece by piece: how row-level security works, how roles and access permissions are structured, and what the different privilege levels mean (user, business unit, parent-child, organization). Along the way, I’ll touch on more advanced topics like sharing, matrix and hierarchy security, and some of the lesser-known privileges such as assign, append, and append to.
It’s going to be a multi-part series, starting simple and building up. Today, we’ll begin with the basics: adding users to an environment.
I’m using Dynamics 365 for the examples, but nearly everything applies equally to Dataverse. The scenario is a simple case management setup, since cases map to a wide range of real-world situations. But I could just as easily have used any custom Dataverse table.
With that out of the way let’s get rolling.
Security Series Table of Contents
- Part One: Adding Users
First things first: you need an environment to play with. If you don’t already know how to sign up for a free trial, I’ll drop a link right here with instructions. For this series, I’ve signed up for a free trial of Dynamics 365 Customer Service (because it’s a ready-to-go example and uses Dataverse under the hood).
Note: Yes, I could have just spun up a blank Dataverse environment and created custom tables, but I want this to look and feel real and also capture some of the D365 nuances. And besides, pretty much everything I show here applies to any Dataverse-powered app, not just D365.
If you’re a Power Platform nerd reading this and think I’ve missed a subtlety, correct me! But for practical purposes: security works the same for both.
Assuming you’re set up, let’s get started.
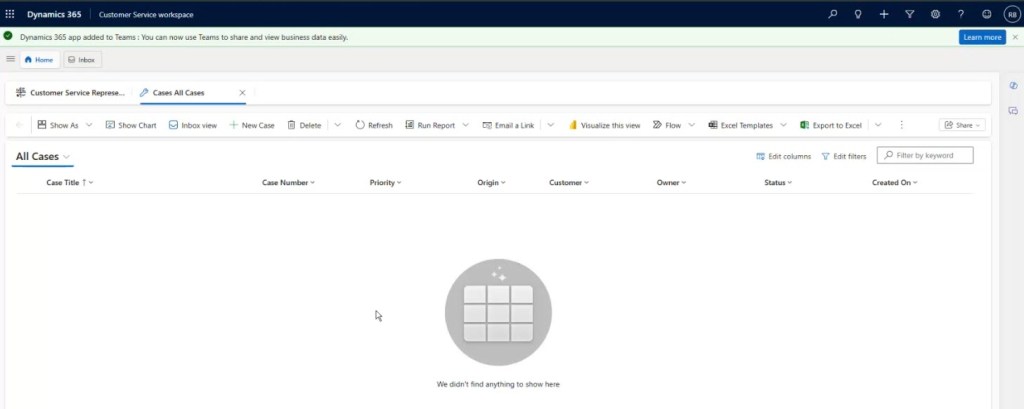
Here i’m signed in and looking at Customer Service Hub. There’s also Customer Service workspace. Both apps could be used and there are differences between them, but that’s a subject for a different blog post (or just read {this blog post})
When you sign up, you’ll be the System Administrator by default. That means:
- You’ve got the System Administrator role, which is basically “god mode.”
- You can see and do everything. Every app, every record. No restrictions.
This is our baseline: full access, no holds barred.
Next up: We’ll look at how to set up a basic Customer Service Representative (CSR) and see what that role really gets you.
That means:
- How to add a new user to your system
- How to assign them security roles (including different methods, because yes, Microsoft gives you about five ways to do the same thing)
- How to check what access they really have
Quick aside:
I’m logged into Customer Service Workspace, which is a multi-session experience.. It’s not the main focus here, but worth knowing about. All the security stuff I show works the same whether you use the Workspace, Customer Service Hub, or any other model-driven app. We’re here for the security model, not the UI tour.
That said, Customer Service Hub is a traditional model-driven app so I might use it going forward – some screenshots might use the hub – others the CSW – but the “cases” view works the same either way.
To make this hands-on, I’ll create sample cases for us to play with.

Now we are ready to play. I’ve created some sample cases in Customer Service Workspace. We’re not here to talk about case management, so don’t expect a “how to triage a queue” deep dive. Cases are just my example objects for breaking down Dataverse security.
The Need for (More) Users
Now that we have the background: I’m currently signed in as System Administrator – which, let’s be honest, is “god mode.” That’s not real life. Real call centers aren’t one-person shows. We need actual agents: people who answer phones, create cases, and action or triage them. In the real world, these users might need to access all cases in the system, but we want to control exactly how they get that access.
Step 1: Add a New User (the Long Way)
Since this is a trial, I have to add users manually. Here’s the process:
- Go to the Microsoft 365 Admin Center → Users → Active Users.
- Click Add user.

- Give them a name. I’ll call my first one CSR User 1.
- Generate username, domain, and password. I like to set a known password (no “change password on first sign-in”) so I don’t trip over myself later.
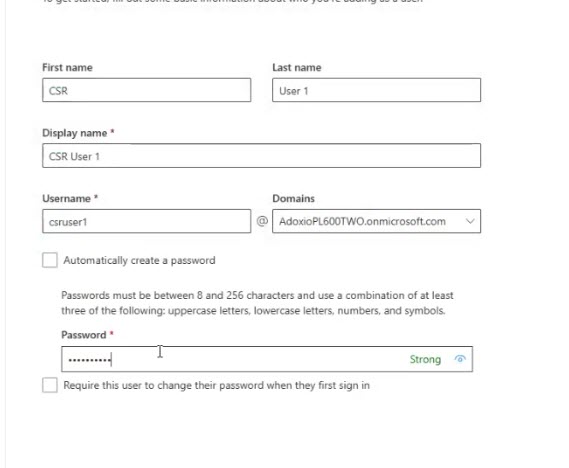
- Assign the D365 licenses so they can use the product

Pro tip:
If you’re playing along with your own trial, use a separate browser profile for each user (I use Chrome identities). That way, you can log in as multiple users simultaneously without losing your mind.
Step 2: Log in as the New User
So, with CSR1 created, I sign into portal.office.com using their shiny new onmicrosoft.com email.
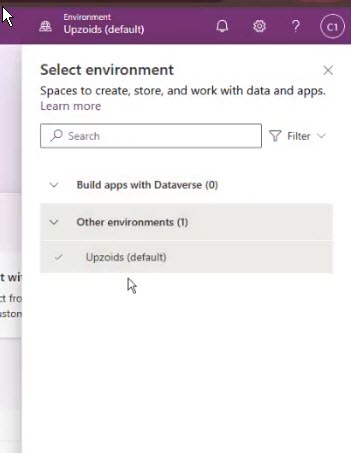
And guess what? No Dataverse environment.
Why? Because licenses ≠ permissions. They have the license, but no security role yet.

This is a really common first-time gotcha.
Step 3: Assign Security Roles
First, head to the Power Platform Admin Center (admin.powerapps.com, using your SysAdmin account)
Remember, I already added CSR1 to my Microsoft 365 tenant. That’s not enough—you still need to add them to the Dataverse environment.
In the Admin Center, go to Users.

- Search for CSRUser1
- Click their name, then click Add.
- It immediately asks – conveniently – “Which roles do you want to assign?”. If you miss this step you can always click on the three dots and choose “Manage Security Roles” and will bring up the same list

Now, scroll through the never-ending list of security roles—half of which seem like they’re for secret Microsoft test pilots or an ancient SharePoint temple priesthood. Ninety percent of these roles are either mysterious or wildly irrelevant.
Now, what roles do they actually need?
- First instinct: always assign Basic User. That’s the foundation. It gives them baseline permissions just to log in and use Dataverse.
- But here’s the thing—it might overlap with other roles. Maybe redundant. Maybe not. For now, let’s not give Basic User and see what happens. I tend to always give it but actually if we really want to learn let’s NOT establish this habit.
What we know for sure: if a CSR is going to view all cases in the system using an OOTB role, they need the Customer Service Representative role.

Sidebar – Customer Service Representative Role Permissions
The Customer Service Representative role is one of the core out-of-the-box security roles in Dynamics 365 Customer Service. Out of the box, this role typically grants:
- Read, Create, Write, Append, Assign privileges for Cases at the Organization level. CSR users can see and work on all cases in the system.
- Access to related core tables such as Accounts, Contacts, Activities, Queues, and Knowledge Articles, usually at Business Unit or Organization level depending on the privilege.
- Permissions to use dashboards, views, and the Customer Service Hub app experience.
- Limited customization rights: CSRs aren’t configuring the system, they’re just working within it.
What it does not give them:
- Access to manage security, solutions, or system jobs.
- App access on its own (that’s what the Customer Service App Access role is for).
In other words: CSR = full case worker access, but not system configuration or app-level permissions.
Step 4: Confirming Access
Ok, let’s try signing in as CSR User 1 and going to make.powerapps.com
hmmmmm….. Well, I still can’t see the app, can you? Or even the Environment… nothing’s changed….
Uh-oh. But I should have access? Well, turns out that the default CSR role has access to all the TABLES the CSR needs, but not the apps they need. Even if you got sent a link directly at this point, it wouldn’t work because you don’t have app access. To fix that, let’s give them the Customer Service App Access role – this grants access to launch the app itself.

OK, now if we refresh as CSR User 1…. We still might not see the app in our list of apps. From portal.office.com – you might, you might not. If not, we can still confirm by copy and pasting the URL of the cases view directly into the browser for CSRUser1

This user now has access to every case in the system. Note that the app being used is Customer Service Hub, not Workspace. So that’s interesting. And the Workspace App still doesn’t show up when you try to pick it from the app picker. But at least we can get to the cases using CSH, which we now have access to.
Sidebar:
Note that The app still might not show up for them in Portal.Office.com or make.powerapps.com. In theory, The way to have that happen is to share the app with them – though sharing it with the role should suffice.
As an aside – the role you need for CSW app access is traditionally Omnichannel Agent – but that seems to keep changing so sharing is the easiest way
Share the App {with screenshots}:
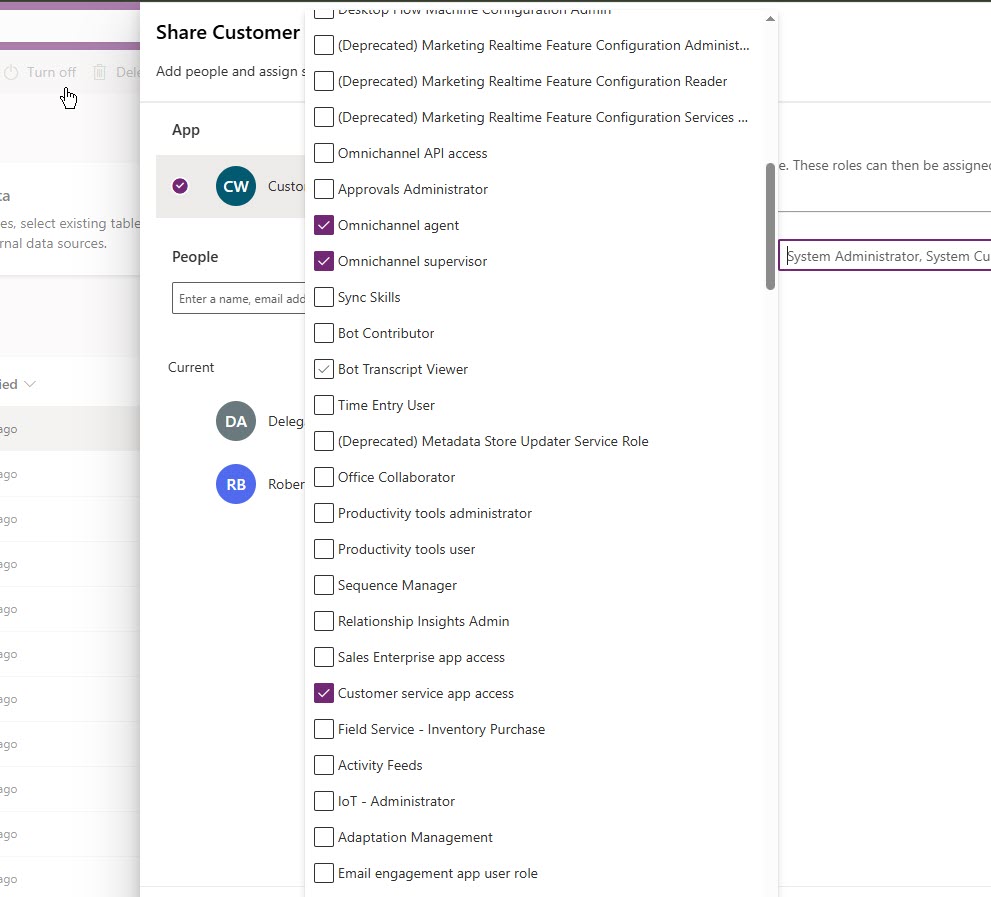
- Go to Power Apps > Apps, find “Customer Service Hub” (or “Customer Service Workspace”).
- Click the ellipsis (…) and select Share.
- In the Share dialog, select the Customer Service App Access security role and/or your new user (“CSR User 1”).
- Save.
- Optionally, copy the app’s link from the app’s details – handy for onboarding emails or documentation.
Why share? Security roles alone don’t make an app show up in the user’s app picker. Sharing the app is what lights up that “oh, here’s your Customer Service app!” experience. If we want the Customer Service Workspace app to appear, we need to do the same for that app – note that the “Customer Service App Access” role does not include access to the workspace app – instead it’s the omnichannel user role that has that.
Step 5: Creating and Owning Cases
At this point, CSRUser1 can:
- See all cases (even ones not assigned to them).
- Create a new case. By default, new records are assigned to the creator.
- Edit existing cases.
Let’s Try creating a new Case – by default it gets assigned to the user who created it – CSRUser1.

So, CSR Rep + App Access = full system-wide access to cases. Mission accomplished. So, that’s nice. But now you have to remember to do this song-and-dance for every new person. Manageable for now? Maybe. Scalable? Ha, ask future-you. We’ll discuss how to make this process a bit more manageable in the next part (I’ll link it here once that part is posted)
Wrapping Up
That’s it for part 1. We:
- Created a user.
- Assigned licenses.
- Added them to the environment.
- Assigned roles.
- Confirmed they can see and edit all cases.
Next up: Let’s dive into the details of what those roles actually do and how you customize them for more nuanced security.

One thought on “Security Series Part One: Adding Users to your Dataverse / D365 Environment”